

“Stop running until it stops hurting” is incomplete advice for runner's knee recovery. Rest may calm symptoms, but it doesn't tell you how much running your knee can handle when you return. Repeating the same training load after a break can leave you back where you started.
A better approach is to treat running load as an adjustable dial. Turn down the demands that provoke pain, build strength alongside tolerable activity, and judge each change by how your knee responds during exercise and the following morning. This plan is for gradual pain around or behind the kneecap, commonly called patellofemoral pain, not a newly injured, swollen or unstable knee.
Recovery Phases and What to Expect in Each
Runner's knee has no fixed recovery deadline. You move through overlapping phases rather than completing a prescribed rest period and automatically returning to normal training.
The distinction matters because symptoms can persist. The Canadian overview of patellofemoral pain clinical practice guidelines reports that approximately 50%–56% of patients still report knee pain two years after diagnosis. That doesn't mean improvement is unlikely. It means that short-term relief and durable running tolerance aren't the same outcome.
Choose your phase by function
Runner's knee recovery phases, timeframes and running rules
| Phase | Typical timeframe | Main goal | Running during this phase |
|---|---|---|---|
| Settle symptoms | Early, while daily activities remain irritable | Reduce pain while keeping the knee moving | Reduced or none. Choose tolerable low-impact activity |
| Control load | Until short sessions produce a stable response | Bring volume, hills and speed down to a tolerable level | Short, flat, easy runs only if symptoms stay mild |
| Build capacity | Progressive rehabilitation over weeks to months | Increase hip and knee strength | Light running that doesn't disrupt exercise progression |
| Graded return | Until repeated running sessions are well tolerated | Move from walking breaks to continuous running | Stepwise increases guided by symptoms |
| Maintain | Ongoing | Preserve strength and avoid abrupt training increases | Full training with monitoring |
These phases overlap. You can begin manageable strengthening while reducing running, and you don't need to finish every strength progression before attempting an easy run.
Longer symptom duration, greater starting pain and poorer initial function are associated with less favourable recovery. Someone who struggles with ordinary stairs needs a different starting point from someone whose knee only aches after a demanding workout.
Progress checkpoint: Advance when the activity you're doing becomes repeatable without a worsening symptom pattern, not because another week has passed.
Know what progress looks like
Look for practical improvements: stairs become easier, discomfort appears later in a run, or soreness settles sooner afterwards. Those changes can matter before pain disappears entirely.
Find the table row that matches your current daily symptoms and training tolerance, not your preferred training schedule. If ordinary activities become more painful after increasing exercise, step back to the last manageable level. Don't keep advancing just because a race date is approaching.
How to Judge Running Load Day to Day
The biggest mistake is treating running as either allowed or forbidden. Distance, frequency, speed, hills, stairs, jumping and recovery demands can all be adjusted. You may tolerate a short flat run while struggling with a longer downhill route.
Nova Scotia's patellofemoral pain guidance recommends reducing aggravating high-impact activity, using lower-impact alternatives and returning gradually. The practical task is deciding what “gradually” means for your knee.
Read the response, not just the watch
Track pain during the run, whether it rises towards the finish, and next-morning symptoms. A comfortable opening stretch doesn't make the entire session tolerable if you finish limping.
Reading your knee response to running
| Pattern | What it suggests | Next move |
|---|---|---|
| Mild pain, no worse by the end, settled by next morning | The current load may be tolerable | Repeat it before making a small increase |
| Pain rises during the run and forces a walk break | Load exceeds current capacity | End the running portion and return to an easier stage |
| Worse the next morning or the day after | Recent combined activity exceeded tolerance | Reduce running demands until daily symptoms settle |
| Swelling, locking, giving way or night pain | Not a simple overload pattern | Stop running and arrange clinical assessment |
| Pain on stairs, squats or prolonged sitting, none while running | Daily-life demands matter too | Modify the trigger and adapt strength work |
Don't let a low pain score override an obvious deterioration in movement. Limping, steadily increasing pain or a worse morning response outweigh a reassuring number. There isn't a universal pain threshold that proves a session is safe for everyone.
The video below provides an additional visual reference for rehabilitation.
Make the log useful
Change one training variable at a time. If you add distance, hills and speed together, you won't know which adjustment caused the setback.
A watch can help record duration, distance and pace, but it can't judge knee readiness. If an uncomfortable strap keeps you from wearing your existing device, Nothing But Bands' Garmin Forerunner watch band collection is a practical replacement resource, not a rehabilitation intervention.
Record the date, distance, terrain, symptoms during running and symptoms the following morning. Add unusually demanding stairs, gym work or time on your feet. For symptoms that emerge mainly after training, our guide to knee pain after exercise offers additional context.
Hip and Knee Exercises to Start This Week
Progressive strengthening is the centre of rehabilitation, not something to add only after rest fails. Train the knee directly and include hip work when strength or control needs it. Don't assume every runner needs the same balance of exercises.
In a Canadian multi-site randomized trial involving 199 adults, hip-focused and knee-focused programmes achieved treatment success in 80.2% and 77.0% of participants, respectively. Those similar outcomes favour choosing the emphasis according to your deficits and response rather than declaring a universally superior muscle group.
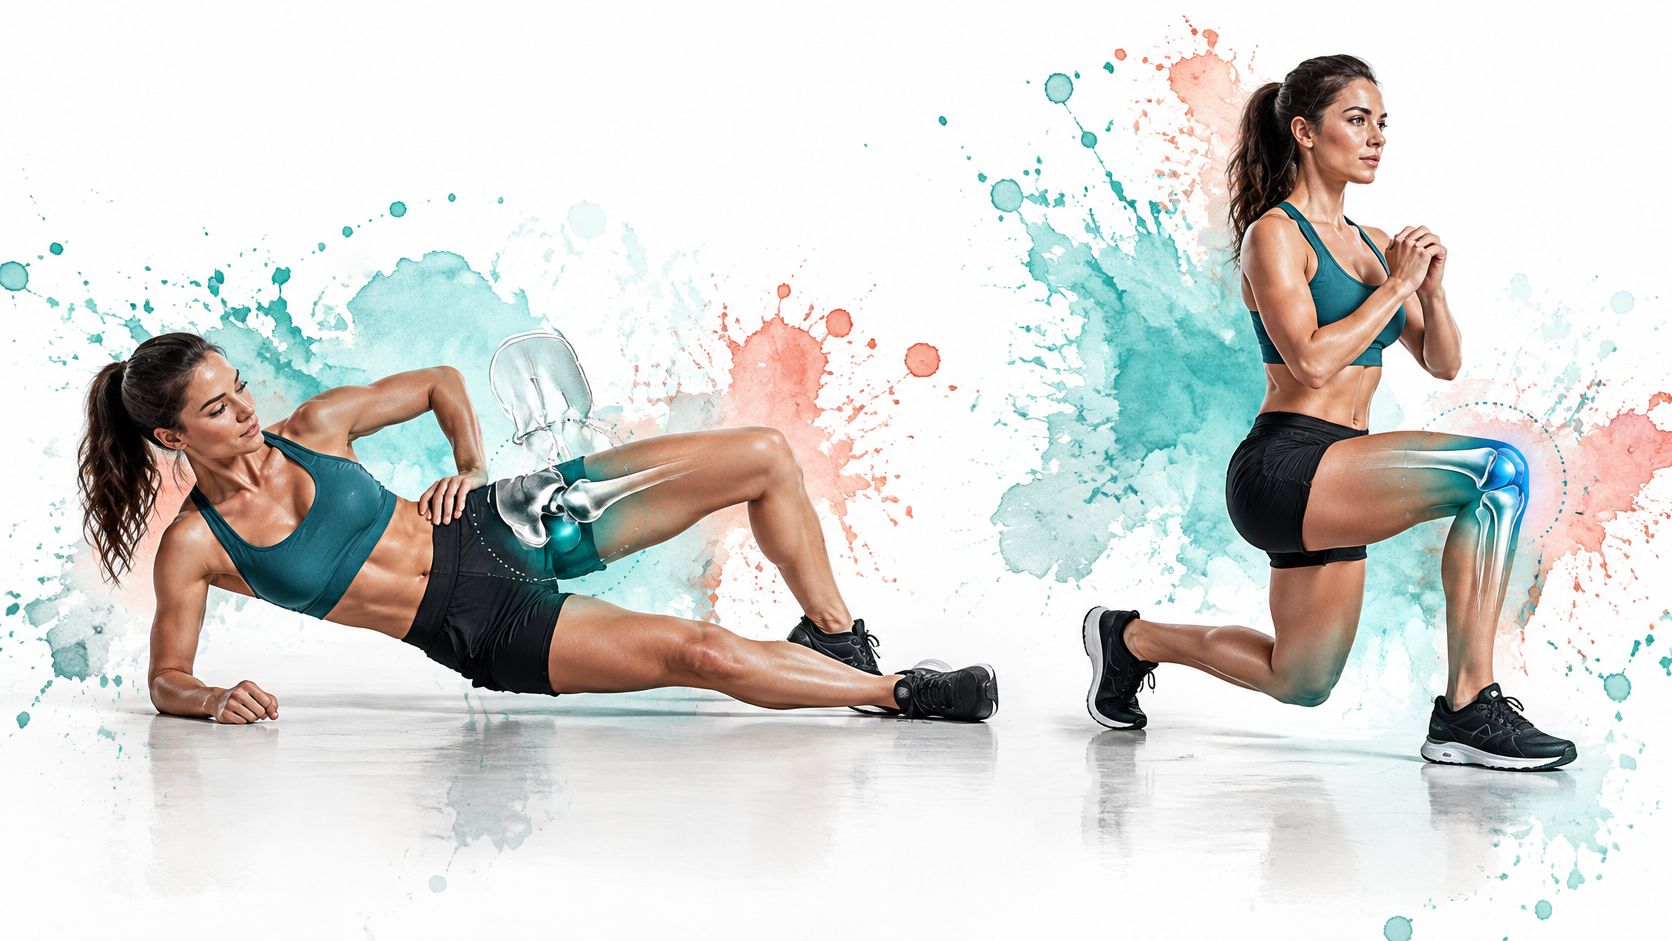
The illustration highlights the hip and knee regions involved in loaded exercise.
Build a manageable starting session
Use the table as an exercise menu, not a requirement to perform everything immediately. Start with movements you can control without provoking a lasting increase in knee pain.
Hip and knee exercises with starting dose and progression
| Exercise | Starting dose | How to progress | Move on when |
|---|---|---|---|
| Isometric quad squeeze | Brief, comfortable holds with full relaxation between efforts | Sustain the contraction, then introduce a leg lift | You can contract firmly without pain or shaking |
| Straight-leg raise | A manageable set without the knee bending | Add light ankle resistance, then slower lowering | The leg stays straight and symptoms remain settled |
| Shallow wall squat | Controlled repetitions within a comfortable shallow range | Increase range, then resistance before trying single-leg work | Repetitions stay smooth without a next-morning flare |
| Side-lying hip abduction | Controlled lifts with the pelvis stacked | Add a resistance band, then standing work | The pelvis remains steady without trunk rotation |
| Band clamshell | Light resistance without rolling backwards | Increase resistance or pause at the top | You maintain pelvic position throughout |
| Single-leg bridge | Controlled lifts without pelvic twisting | Add a pause or light external resistance | The hips stay level and the knee remains comfortable |
| Step-down from a low step | Slow lowering with support available | Increase step height or slow the descent | You control the movement without dropping or buckling |
Use technique to choose the load
For a quad squeeze, straighten the leg comfortably and tighten the front of the thigh without holding your breath. During a straight-leg raise, reset if the knee starts bending rather than forcing through fatigue.
For wall squats, choose a depth you can repeat comfortably. Deeper isn't automatically better, and a single-leg version is a substantial increase in demand, not a compulsory next step.
The step-down is a useful single-leg control checkpoint. Lower the opposite heel towards the floor while keeping your pelvis reasonably level and your stance knee moving smoothly over the foot. If the knee repeatedly collapses inward or you drop onto the trailing heel, lower the step or use hand support.
Add resistance or range only when you can control the existing version and your knee remains settled the following morning.
When pain is active, leave recovery space between loaded sessions rather than training hard every day. Gentle quad contractions may be easier to tolerate more frequently, but don't turn them into repeated painful tests. Our knee pain relief exercises guide provides further exercise options to discuss with your physiotherapist.
Should You Change Your Running Form
Fixing your form isn't a guaranteed cure for runner's knee. A gait change may help, but the evidence doesn't justify telling every runner to increase cadence, abandon heel striking or adopt a particular landing style.
In a Canadian cohort of 58 runners, participants completed education with training modification, education plus exercise, or education plus gait retraining over eight weeks; 78% achieved clinical success at the three-month follow-up. Gait retraining wasn't consistently superior to the other approaches, so a form change should solve a specific problem rather than satisfy an ideal-looking stride.
Before experimenting, write down what you're trying to improve and how you'll judge it.
Test a cue instead of rebuilding your stride
Try a modest adjustment on a short, flat, easy run. Slightly quicker steps may feel helpful for some runners; others may benefit from a physiotherapist's cue addressing hip or trunk control.
Keep the experiment simple:
- Change a single feature. Don't combine a new cadence, new shoes and a new foot strike.
- Hold pace steady. A metronome or watch can help you practise quicker steps without accidentally running faster.
- Record the whole response. Note knee symptoms before, during, afterwards and the following morning.
- Watch other areas. Stop the experiment if new calf, Achilles or shin pain appears.
The trade-off is redistribution of demand. A cue that makes the knee feel better can still overload another area if the change is abrupt.
Don't force a forefoot landing just because it looks softer. If a small adjustment repeatedly improves comfort without new symptoms, keep it while continuing strength and load work. If it makes running awkward without a clear benefit, drop it.
Our guide to preventing knee pain when running can help you review training habits before making larger technique changes.
How to Return to Running in Six Stages
Persistent symptoms don't rule out progress. A Canadian rehabilitation study of 21 runners with symptoms lasting at least three months found significant improvements in pain and function, alongside reduced instantaneous vertical loading rate, a measure associated with running impact. Its small before-and-after design supports a broader rehabilitation approach, not a guaranteed recovery schedule.
Clinical recommendations give combined hip- and knee-targeted exercise a Grade A recommendation, while gait-retraining options carry Grade C evidence, according to the clinical review of patellofemoral pain management. That's why a return to running should retain strengthening rather than replace it with technique practice.
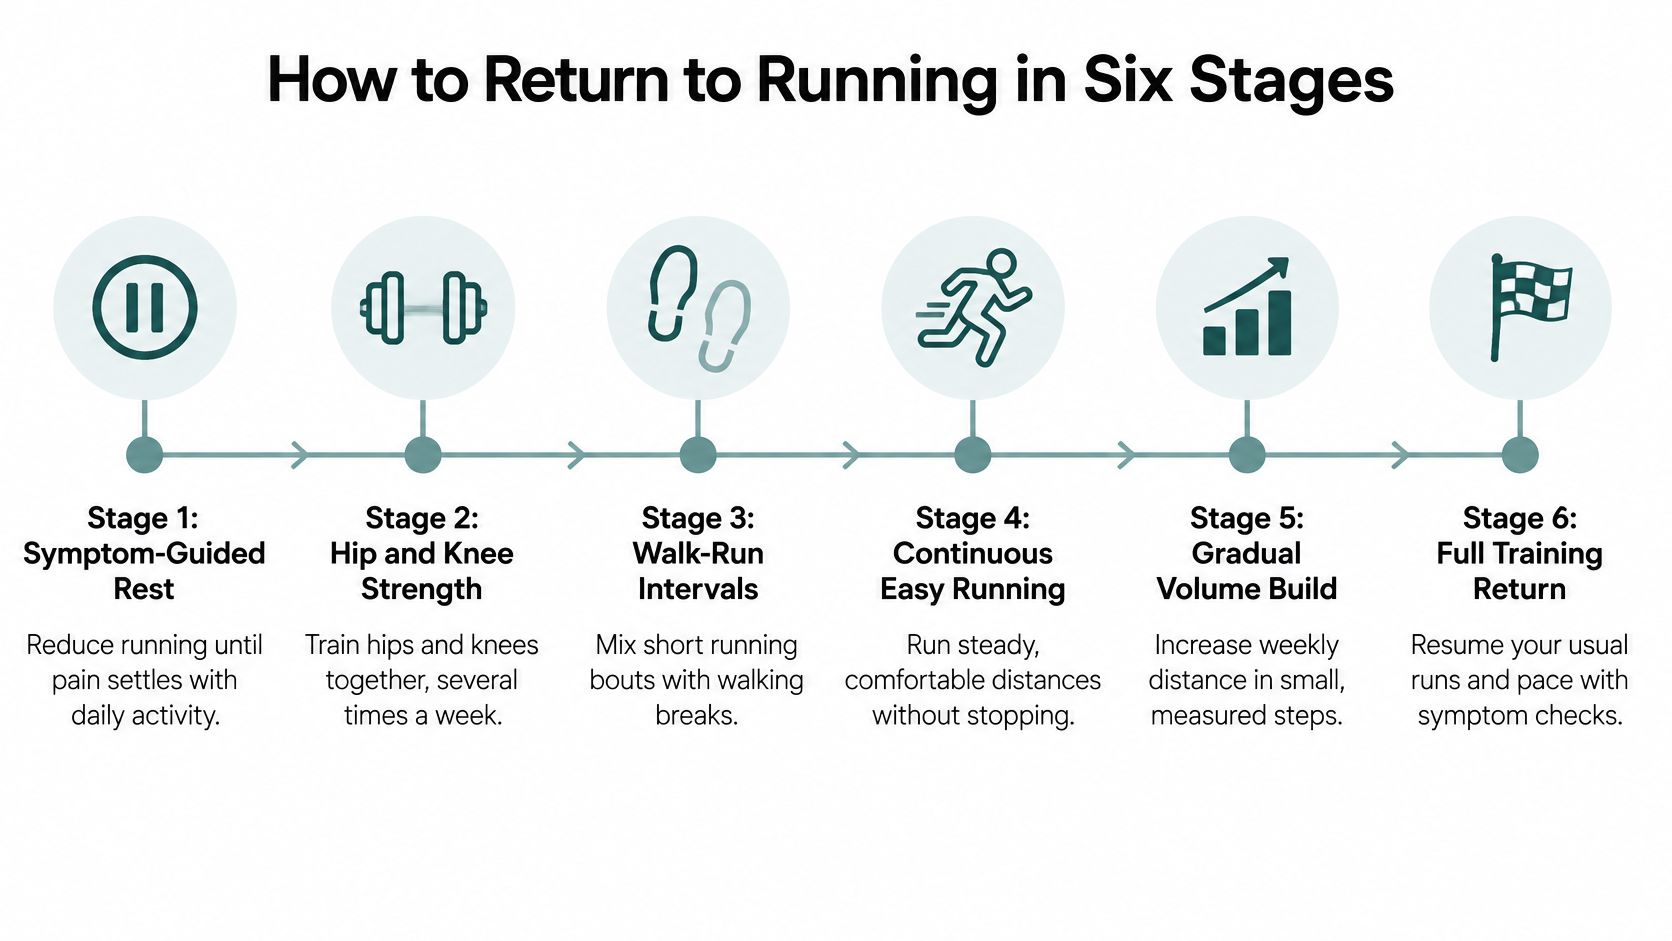
The infographic shows the broader rehabilitation pathway, from settling symptoms to full training.
Choose a repeatable running session
The running stages below begin after daily activity and brisk walking are manageable. They describe running exposure, rather than the broader preparation stages shown in the infographic.
Return-to-run stages with session pattern and advance rule
| Stage | Session pattern | Frequency | Advance when |
|---|---|---|---|
| Stage 1 | Brief easy running bouts separated by longer walking breaks | Leave a recovery day between sessions | Repeated sessions leave no next-morning increase |
| Stage 2 | Longer running bouts with comfortable walking breaks | Continue alternating running and recovery days | Symptoms remain stable during and after sessions |
| Stage 3 | Extend the running bouts and reduce walking | Keep recovery days while total running rises | You finish without escalating pain or altered movement |
| Stage 4 | A short continuous easy run | Repeat before extending | Continuous running produces a stable morning response |
| Stage 5 | Build a repeatable easy continuous run | Establish a sustainable weekly pattern | The current schedule remains manageable alongside strength work |
| Stage 6 | Increase volume gradually, then trial hills and later speed | Resume your usual pattern progressively | You tolerate the added demand without persistent symptoms |
The exact interval duration should fit your starting capacity. A runner returning after a long break may need very brief jogging bouts; someone already tolerating short runs doesn't need to begin from complete rest.
Handle setbacks without restarting everything
A flare means the latest dose needs adjusting, not that all previous progress has disappeared. Let symptoms settle, then retry a smaller version of the session or return to the last well-tolerated stage.
Return-to-run judgement: Finish with enough capacity to repeat the session, not with the longest distance you can endure.
Continuous running isn't automatically harder than intervals. Shortening total running time while removing walking breaks can be a useful transition. Increase duration only after the continuous format becomes repeatable.
Avoid adding hills to a week when you've already increased distance. Keep easy pace genuinely conversational, and retain strength work as running grows. For a broader restart after time away, use our guide to working out after a knee injury to help organise the transition.
Self-Care Support and When to See a Clinician
Self-care tools should make rehabilitation more comfortable. They don't demonstrate that your knee is ready for more mileage, and they shouldn't become a way to finish sessions that consistently worsen symptoms.
Choose an adjunct for a clear purpose: cooling for short-term comfort after activity, gentle warmth for stiffness, or a topical analgesic for temporary pain relief. Judge success by whether it helps you move comfortably, not whether it lets you ignore the load response.
Put comfort measures in their place
Cold after an irritating session may help with discomfort. Wrap a cold pack in cloth, check your skin frequently and stop if the skin becomes painfully cold or numb. New or obvious swelling needs assessment rather than repeated icing followed by another test run.
Gentle heat may feel better when stiffness is the main issue. Use comfortable warmth, protect the skin and avoid applying heat to a hot, swollen knee.
- Topical relief. We apply MEDISTIK before activity to reduce pain. Stop use and consult a physician if the condition worsens, a rash or irritation develops, or symptoms persist for more than 7 days.
- Route choice. Replace steep descents and cambered roads with flatter, more even routes while symptoms are irritable. Keep the route familiar so terrain doesn't become another changing variable.
- Footwear. Use comfortable shoes you already tolerate. Don't combine a major footwear change with increased running or a new landing style.
- Sitting and sleep. If prolonged knee bending aggravates symptoms, change position regularly and allow the leg to straighten comfortably. Choose a sleeping position that doesn't leave the knee compressed or painfully bent.
Don't place a heating pad over a topical analgesic or apply it beneath an occlusive covering. Follow the specific product directions, particularly around skin condition and application.
Decide whether self-management is working
Self-management is reasonable when the pain is activity-related, responds to reduced demand and shows a consistent improving trend. You should gradually be able to do more, recover sooner or manage daily activities with less discomfort.
Book a physiotherapy assessment if progress stalls, symptoms keep recurring or you can't find a manageable exercise level. There's no need to wait for an arbitrary deadline when pain is changing your gait or interfering with ordinary life.
Seek assessment promptly for:
- Mechanical symptoms. Locking, repeated giving way or inability to move the knee normally.
- Unusual pain. Persistent night pain, pain at rest or worsening symptoms despite reduced activity.
- Visible changes. Significant swelling, redness or a hot knee.
- Acute deterioration. A new injury, inability to bear weight or rapidly worsening pain.
A hot, swollen knee with fever or feeling unwell needs urgent medical attention. Our guide to knee joint pain and swelling provides additional context, but it shouldn't delay care for concerning symptoms.
Bring useful information to the appointment
A physiotherapist can assess strength, single-leg control and running mechanics, then test which changes actually improve your function. A home mirror check can reveal a movement you struggle with, but it can't establish the diagnosis or explain every contributor.
Digital tools may help organise exercise instructions and symptom records. The Zee Palm physiotherapy app case study offers an example of app-based assessment and recovery design, not evidence that an app can replace an individual examination.
Tomorrow morning, choose your current phase, select manageable exercises and adjust your next run accordingly. Start recording the knee's response, including everyday demands outside training. If you can't establish a clear improving pattern, bring that record to a clinician rather than repeatedly testing the same painful workload.
MEDISTIK offers topical pain relief for sore muscles and joints that can support comfort alongside your runner's knee rehabilitation. Visit MEDISTIK to explore the available formats and pain-management resources, while keeping progressive strength work and symptom-guided running at the centre of your recovery.


